Mohawk XL14 Repairs and Skid Plate Installation July 2019
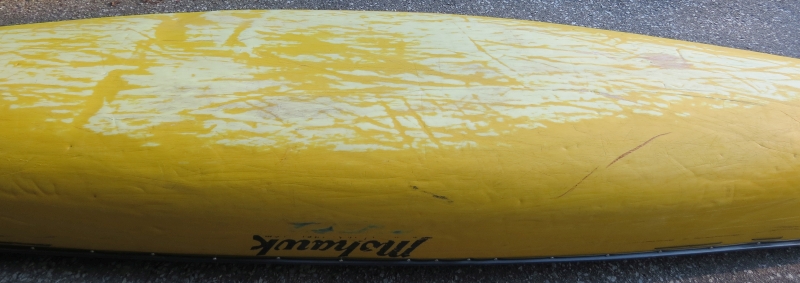
I acquired this boat second-hand in 2014, it was one of the last Royalex boats made by Mohawk before they stopped production in 2013. It had been used for only one previous trip (a rough high water run down the Kattawagami), had the typical scratches that you would expect from a boat that had its share of dragging over rocks but little if any of the vinyl skin had been worn through.
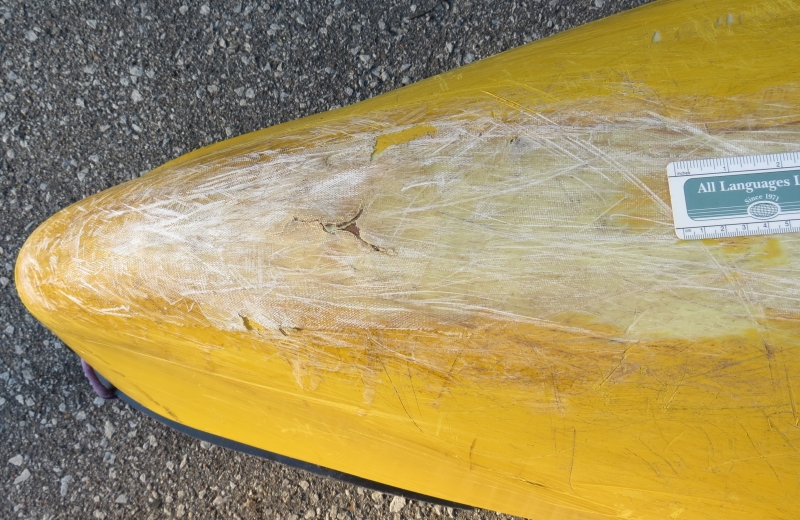
Here you see it after 245 days and over 4500km of my best effort at seriously Canoe abuse.
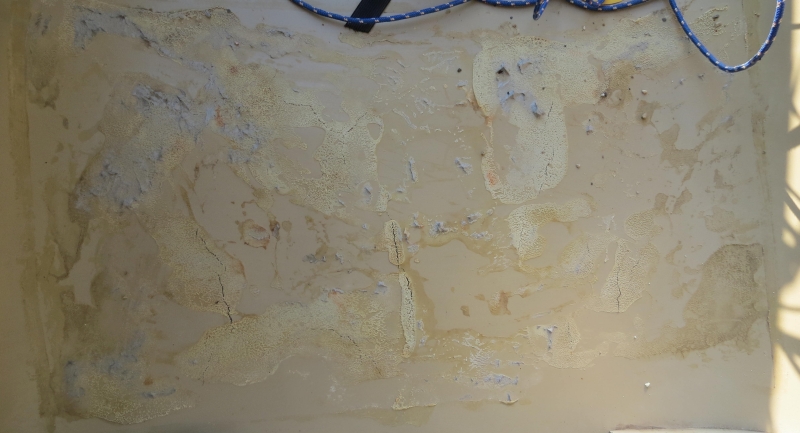
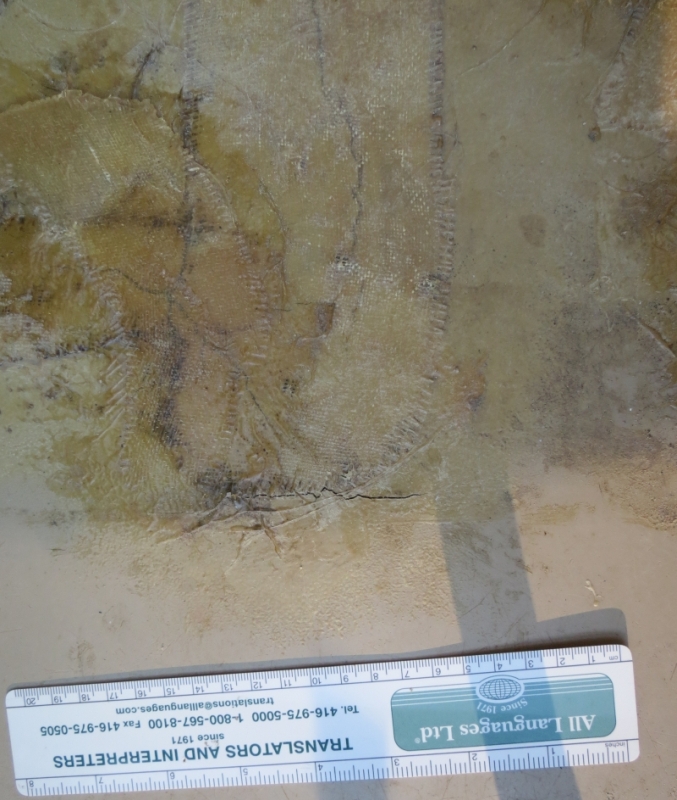
When I acquired the boat it had a large ōdoggie padö installed, after a year or so the pad started to disintegrate so I ripped it out. I was shocked to see what was underneath, besides the mess of contact cement the section under the pad had multiple spider cracks, fortunately all of them only penetrated the inner layer of Royalex, the outer although dinged here and there was completely intact. I attempted to remove the contact cement but had little luck, acetone was about the only thing that worked at all and in my test spot, I had to use so much that the Royalex was starting to ōmeltö.
I gave up on that and went ahead with patching the cracks using s-glass and Gflex 655. Previously to this I had only worked with ōregularö epoxy, the Gflex was a joy to use as the 655 is the ōthickenedö version that you can mix up on a palette (stiff cardboard in my case) instead of mixing the two parts in a container. Over the past couple of years I would return from my big trips with one or two new cracks in the same area, I repeated the process for those cracks, the previous patches were holding well and none of the existing cracks grew in length.
This year I found one of the old patches was starting to separate from the hull so I ripped it off and replaced it while fixing the two new cracks from last year.
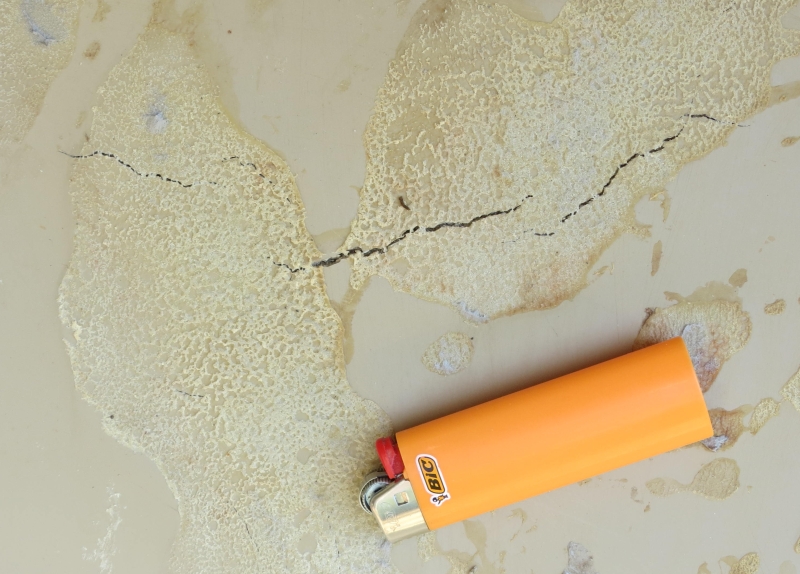
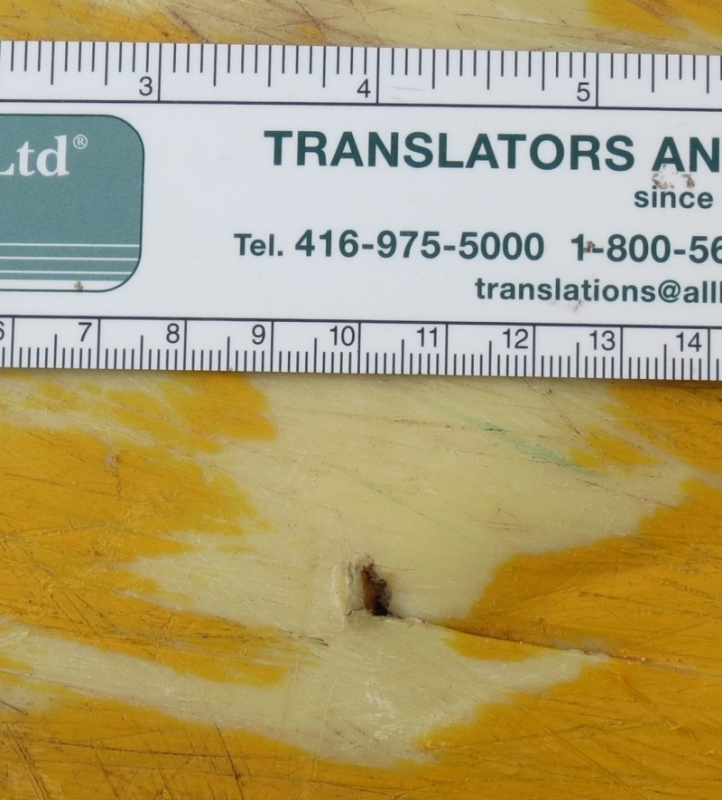
Over time, the bottom exterior developed some deep gouges and a couple of tiny cracks, which I patched in the same way. This year I inspected those, most were fine, one just needed a tiny piece of s-glass and some epoxy. I also found a small hole that had fully penetrated the outer layer of Royalex, it was at the end of a gouge about 6 inches long. Probably caused by being hung up on a sharp rock and then rocking the boat back and forth to dislodge. I just filled this will Gflex with no patch.
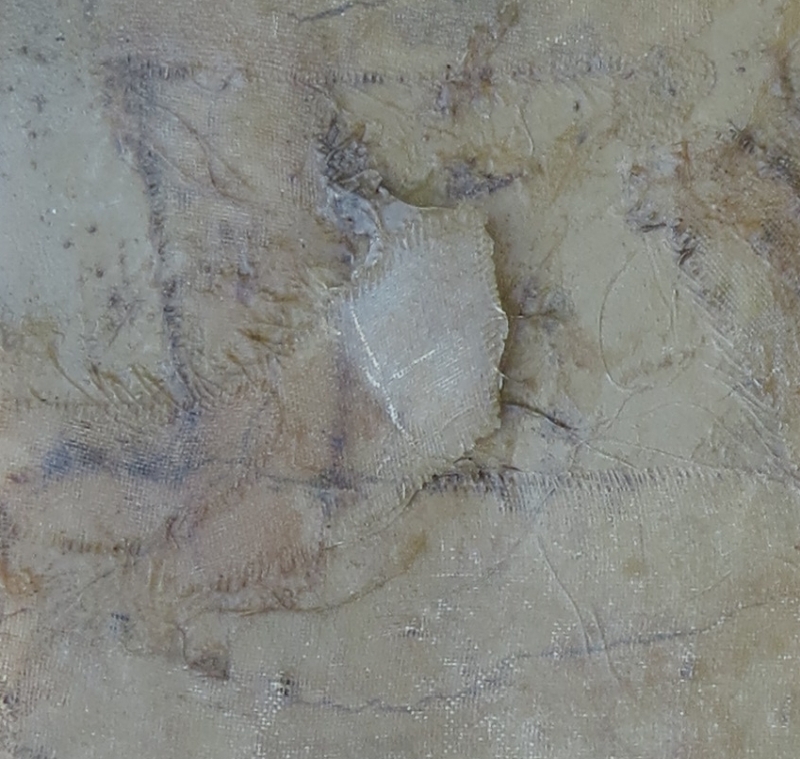
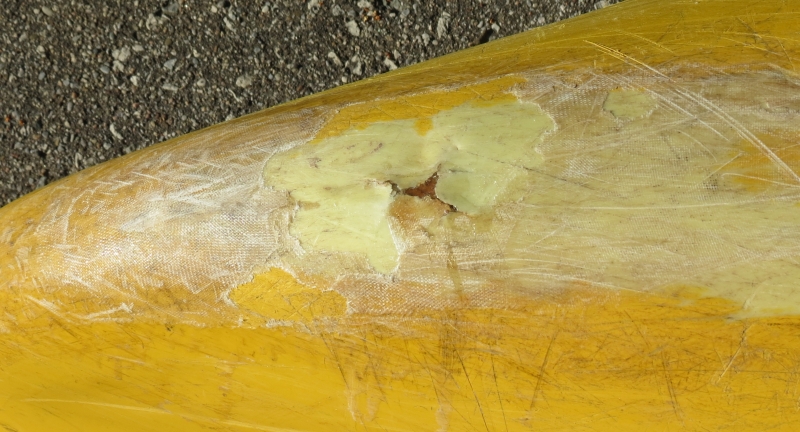
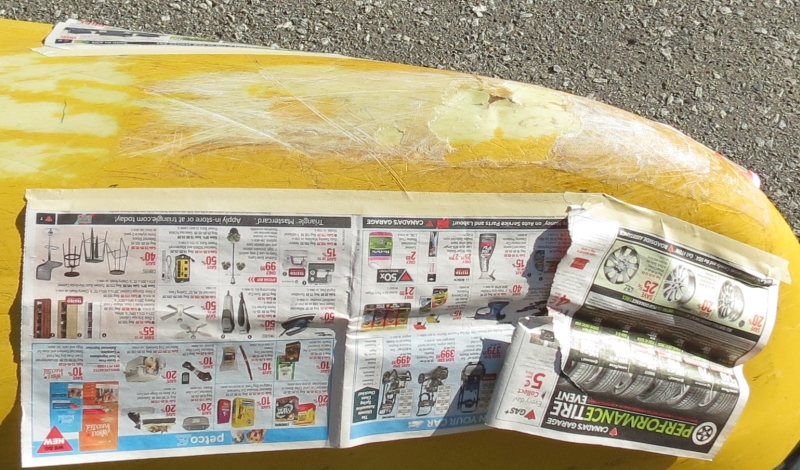
Now on to inspect the ends where the most damage typically occurs. After the first year I had installed ōskid platesö on both ends using regular epoxy and multiple layers of S-glass, initially it was six layers with small pieces first and then a larger piece to finish. My only previous experience with skid plates was using the traditional Kevlar felt, the s-glass went on really easy, very simple to wet out and once done it is barely visible as the yellow boat colour shows through almost like nothing was there. Each year, I would find a few small wear spots (s-glass in not that abrasion resistant), I would just cover that area with another layer but using Gflex since so little is required. By now, I might have as many as 10 layers of s-glass in some places but still unless you get real close you cannot tell that it is there. A couple of years ago I discovered a significant impact ōcraterö at the stern, I had patched this but the patch had now worn off exposing the inner foam.
For years, I have been reading online posts from devotees of something (a fabric) called Dynel claiming it was far superior to Kevlar felt, unfortunately there seems to no source in Canada for Dynel, none of the specialty suppliers carry it here. After reading even more raving about Dynel recently I decided to import some myself to apply to this boat and to offer it to other Canadian paddlers.
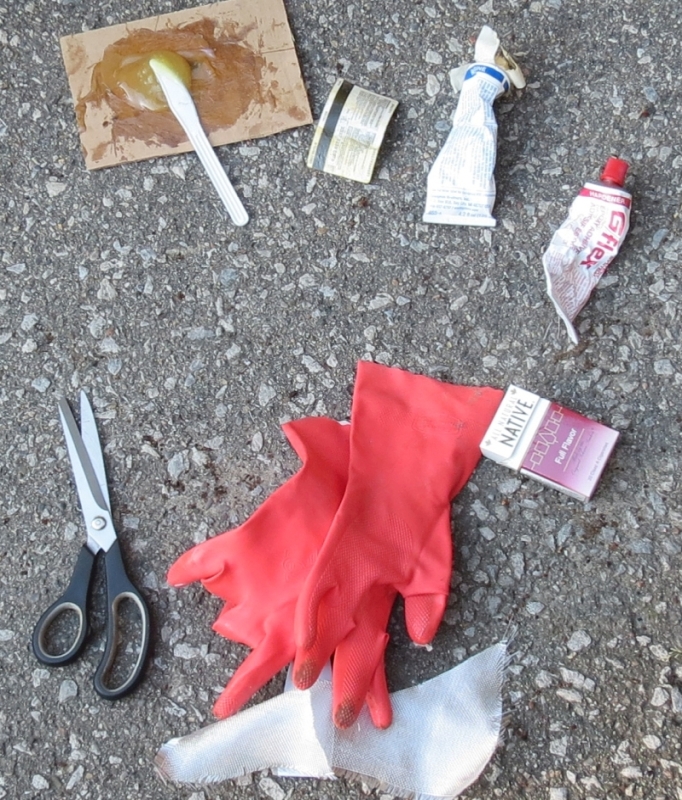
All I needed now was some ōrelease fabricö (also known as peel-ply) and new supplies of Gflex since my original tubes were near empty. It was recommended to use Gflex 650 the ōtoughenedö version instead of 655 ōthickenedö, it took a couple of trips to Noah's Marine because they were out of stock of ANY version of Gflex the first time. Next visit they had both 650 and 655 in stock; I hummed and hawed and ended up buying more of the 655 plus a yard of release fabric (something I have never used).
After inspecting the ends I decided the bow was in fine condition as it was and I really only needed to do the stern. I think most people see the most abrasion on the bow end, mostly from landings and/or hitting small rocks in shallow rivers/rapids. I on the other hand see the most damage in the stern! This is due a few things; first, I do a lot of dragging and frequently dragging while partially loaded with the load in the rear, any portage of less than about 200 metres I usually drag and some even longer ones. I am also running a lot of Class II/III (and some Class IV) rapids, scraping over ledges and smacking the stern happens frequently and IÆm in a heavily loaded boat often ōenhancedö by many gallons of water sloshing about!
Step one: Clean out the ōcraterö and scrape off any loose bits of s-glass
Step two: Clean the area with Acetone and let it thoroughly dry overnight
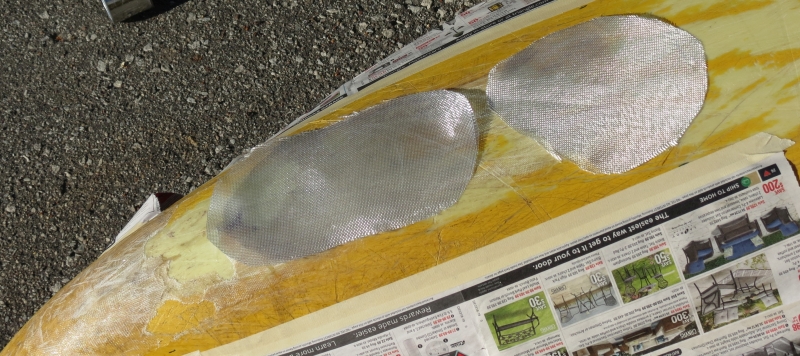
Step three: Fill the ōcraterö with Gflex and cover with two layers of s-glass
Step four: Measure the area for the skid plate, in this case about 4 inches at the stem and about 6.5 inches at the wide end, length was 24 inches, which covers all the area with significant wear.
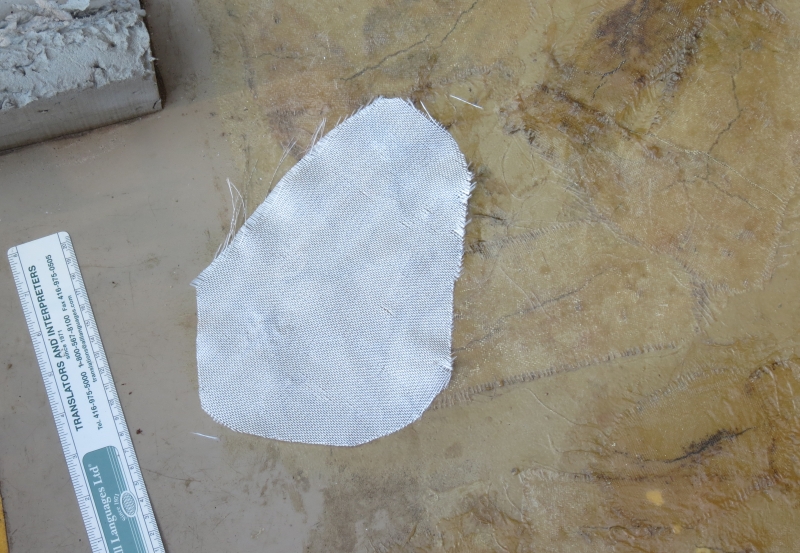
Step five: Mark and cut the Dynel (scissors) on the bias
Step six: Measure and cut a piece of release fabric about 1 ¢ 2 inches bigger than the Dynel
Step seven: Tape pieces of newspaper (crappy tire flyers / masking tape) to protect the hull from epoxy drips, I placed the tape about ╝ inch away from where the edges of the Dynel would be (a touch further might have been better)
Step eight: mix up some Gflex
Step nine: Apply a few random dabs of Gflex to the area, just enough to hold the Dynel after I place it in position
Step ten: layout the Dynel, this is where I see that my cutting was not exactly perfect but still good enough
Step eleven: Apply Gflex, I use an old plastic phone card, credit card or hotel ōkeyö for this
Step twelve: Ensure the Dynel is fully wetted and there are no air bubbles
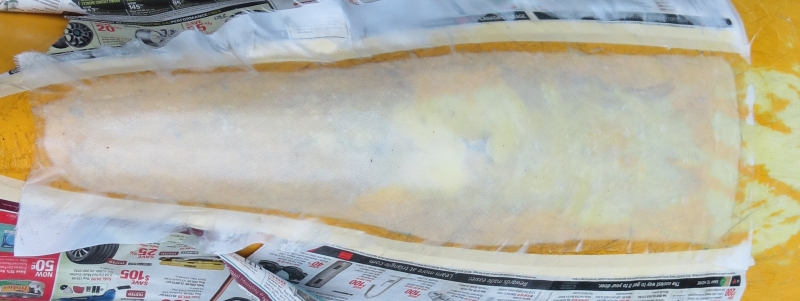
Step thirteen: Place the release fabric on top of the Dynel. IÆve been told about using a roller to firmly squeeze the Dynel, I planned to use a piece of ABS pipe that I had hanging around but it really didnÆt work well on the curved surface, it was creating creases/folds in the Dynel. I switched to simply doing it by hand (with kitchen gloves of course not bare hands!), this seemed to work very well. The outer side of the release fabric got ōstickyö but there was very little seepage from the edges of the Dynel. I think this is because I used the ōrightö amount of Gflex plus being the thickened variety it does not ever drip much
Step fourteen: Put the boat back on the rack in the garage
Step fifteen: Next day, have a peek to see how it looks; the release fabric was still a bit tacky
Step sixteen: Remove the tape and newspaper. This is where I realized the tape was too close, a small bit was stuck under epoxy and in one tiny spot the Dynel was just over the tape so did not adhere to the hull (itÆs a very small spot, I donÆt think itÆs an issue but the Dynel may tend to ōpeelö there over time
Step seventeen: leave it for another 24 hours to cure
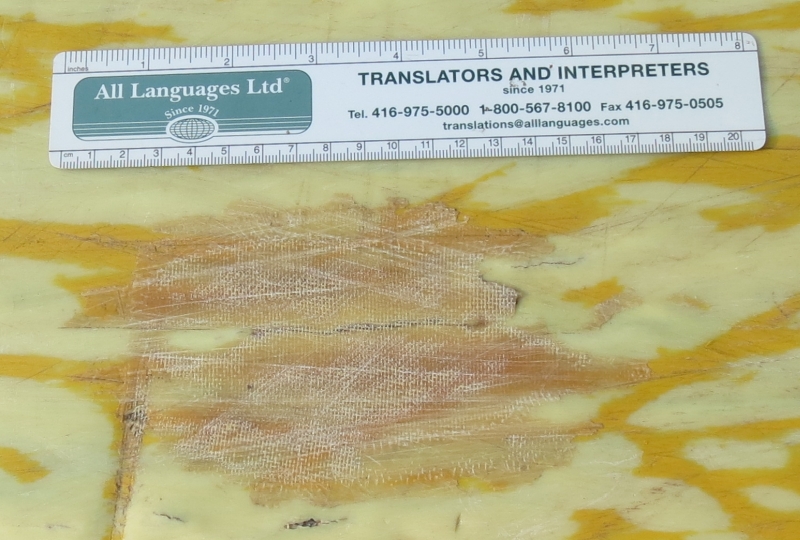
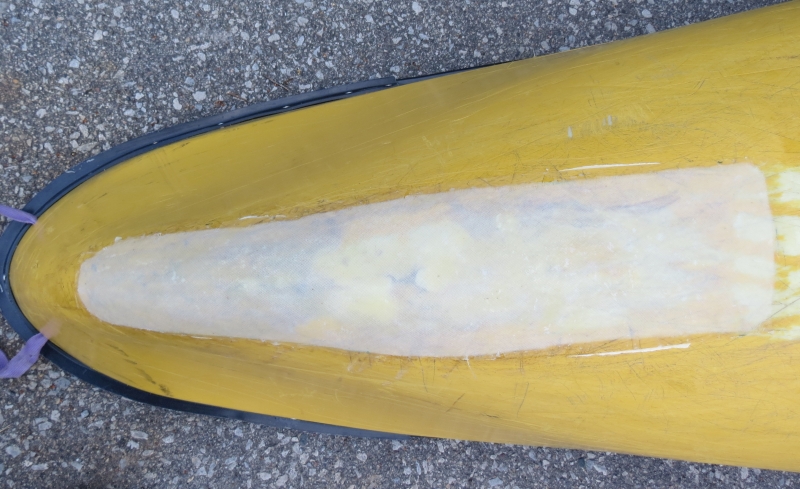
Step eighteen: Strip off the release fabric. Having never used the stuff I wondered how easy it was to pull offģ.easy peasy, no effort required
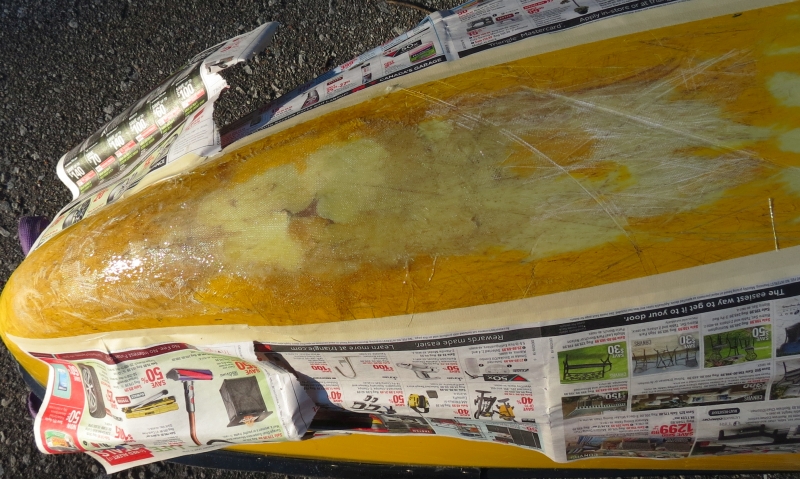
Step nineteen: Admire my handiwork! Looks great! I had heard the Dynel would turn opaque but it did somewhat, more than s-glass alone for sure but the boat colour is still visible as are the ōdefectsö. I did not quite get an absolute straight placement of the Dynel, that combined with an imperfect cutting job made it a tiny bit wonky but I am sure by now you know that ōlooksö are not important to me. The Dynel is supposed to ōswellö but to me it does not seem much different from before the Gflex. I hope that that is because of the pressure massage I gave it rather than a lack of full saturationģ.only time will tell.
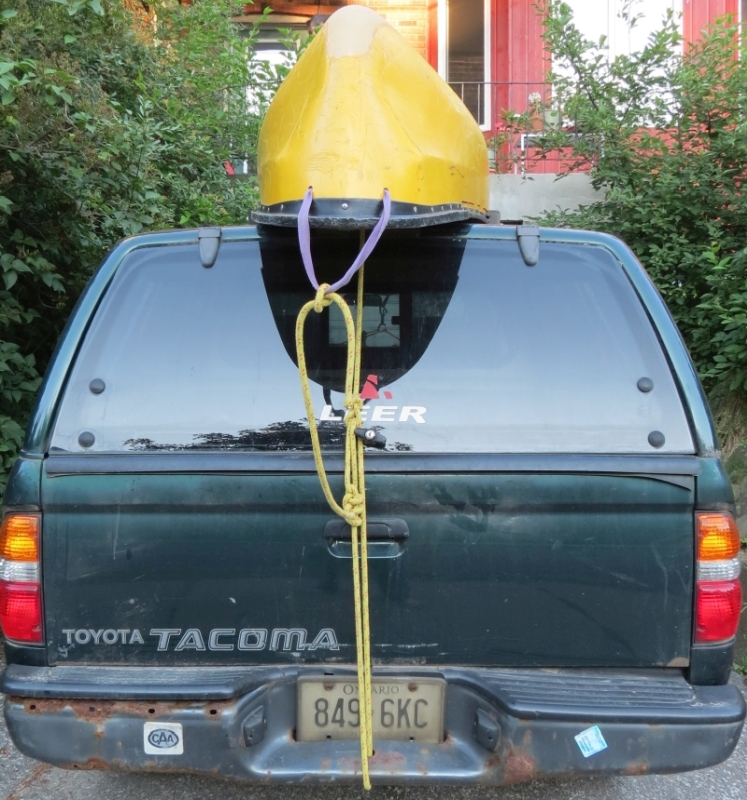
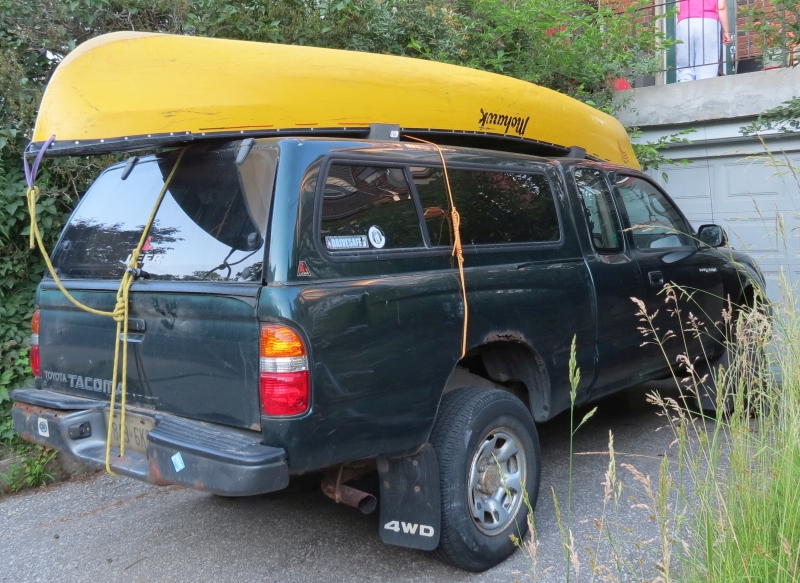
Step twenty: load on my truck in preparation for my upcoming trip.